"ThunderAI" Tutorial - Create Your First Custom Prompt
In this tutorial you will build a complete, working custom prompt from scratch.
The goal is a prompt that drafts a formal reply to an email, addressed to the right person, written in a tone you define on the spot, and signed with your name.
We'll combine a custom prompt, standard data placeholders, and a custom data placeholder.
By the end you will know how all three pieces work together, and you can apply the same approach to any prompt you want to build.
What we are building
The finished prompt will:
- Address the reply to the original sender by name, pulled automatically from the email.
- Ask you for a tone (e.g. "formal", "friendly", "brief") every time you use it.
- Sign off with your name, stored once as a custom data placeholder.
The final prompt text will look like this:
Write a reply to the following email.
Address the reply to: {%author%}
Tone: {%additional_text:tone%}
Sign the reply with: {%thunderai_my_name%}

{%mail_text_body%}
Step 1 — Create a custom data placeholder for your name
First, store your name as a reusable custom placeholder, so you don't have to type it into every prompt you create.
Open ThunderAI Options and click the
 button to open the custom data placeholders tab.
Add a new placeholder with these values:
- ID:
my_name— This becomes{%thunderai_my_name%}in your prompts. - Name:
My Name— A descriptive name that is useful to you. - Data Placeholder Text: your full name, e.g.
Jane Smith. - Usable in prompts added to menu:
Composing an email— We need this only when composing an email.
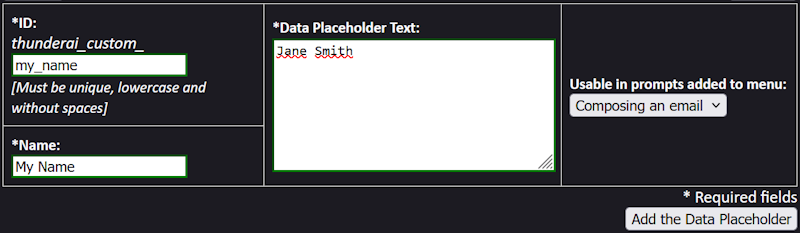
Save it. You can now use {%thunderai_my_name%} in any prompt and ThunderAI will replace it with your name automatically.
Step 2 — Create the custom prompt
Go to the Custom Prompts tab in ThunderAI Options and add a new prompt.
Fill in the fields as follows:
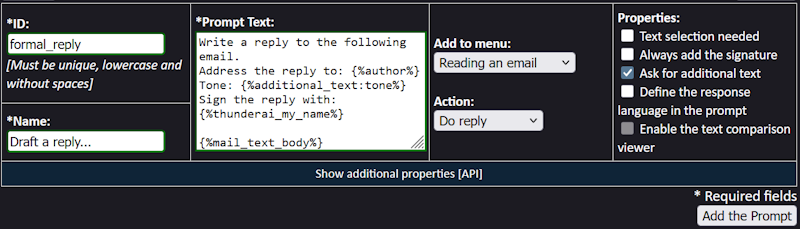
- ID:
formal_reply - Name:
Draft a reply...— The name will appear in the ThunderAI menu. The...is a useful convention to signal that the prompt will ask for input before running. - Prompt Text: copy the prompt below.
Write a reply to the following email.
Address the reply to: {%author%}
Tone: {%additional_text:tone%}
Sign the reply with: {%thunderai_my_name%}

{%mail_text_body%}
A note on the placeholders used:
{%author%}— A standard placeholder that inserts the sender's name and email address from the email header.{%additional_text:tone%}— A user input placeholder: ThunderAI will ask you to type the tone each time you run this prompt. The IDtoneis the label shown in the input field.{%thunderai_my_name%}— The custom data placeholder you created in Step 1.{%mail_text_body%}— The full body of the email, so the AI has the context it needs.
Step 3 — Configure the prompt settings
Still in the new prompt form, set the following options:
- Add to menu: Reading an email — You want to reply to received emails, not use this while composing.
- Action: Do reply — This will open a compose window pre-filled with the AI's draft.
- Ask for additional text: enable this — It is required for the
{%additional_text:tone%}placeholder to work. - Always add the signature: leave this off — Since we are already adding the name via the prompt itself. Enable it if you want the ThunderAI signature, defined in the preferences, appended as well.
Here, clicking on Show additional properties you can also define specific configurations for the APIs or the ChatGPT Web Interface (like a specific Model or a Custom GPT) that will only apply to this prompt.
Add the prompt and click on the Save All button.
Step 4 — Try it out
- Open any received email in Thunderbird.
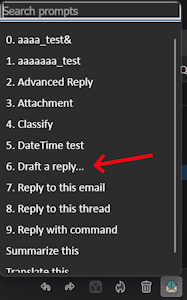
- Open the ThunderAI menu and select Draft a reply...
- ThunderAI will show an input field labelled tone, type something like
formal and conciseand confirm.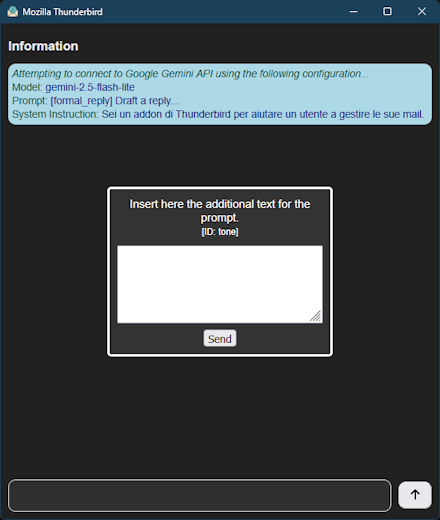
- The prompt is sent to the AI with all placeholders resolved.
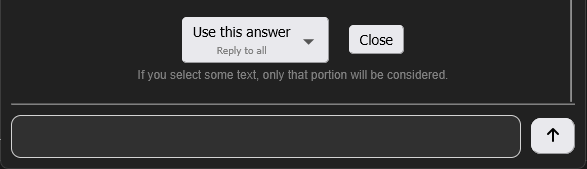
- After the AI answers, click the Use this answer button to import the text in a new compose window.
What to try next
Now that you know how the pieces fit together, here are a few directions to explore:
- Add more custom placeholders — Store your job title, company name, or a standard disclaimer, and reuse them across all your prompts.
- Add more user input fields — You can have multiple
{%additional_text:<id>%}placeholders in the same prompt, each with a different ID. Each one becomes a separate input field. - Enable the diff viewer — If you build a proofreading or rewriting prompt with the Substitute the original text action, enabling the diff viewer lets you review changes before accepting them.